Blink tutorial
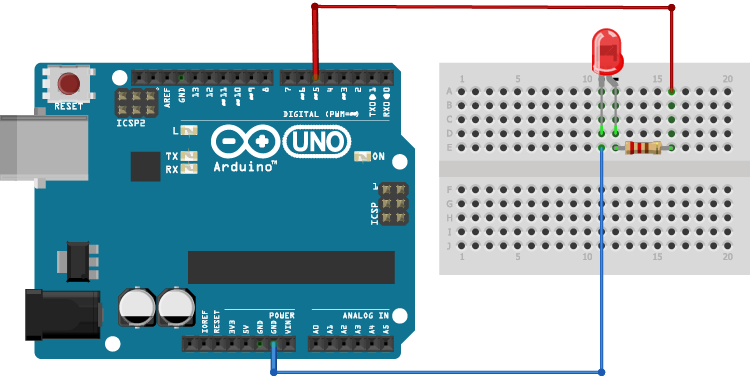
Circuit
First of all connect LED with 220 ohm resistor to pin 5.
Basic example
Make sure that Involt is installed. If you don't know how to do this go to getting started page.
Add code to body section of app.html to generate switch between HIGH and LOW states of pin (or 0-1).
Now add digitalWrite to void loop and pinMode (pinMode is required for digitalWrite to work correctly) to void setup inside Involt Arduino sketch (in Arduino folder). The value received from App is stored in involtPin[] array with index which represents the target pin.
void setup(){
Serial.begin(57600);
pinMode(5,OUTPUT);
}void loop(){
involtReceive();
digitalWrite(5, involtPin[5]);
}...
PWM
Instead of digitalWrite use analogWrite in your sketch:

Rangeslider
There are more sophisticated elements. One of them is rangeslider. It will change the brightness of connected LED.

Each UI element has its default settings (based on PWM and analog read resolution) so in this case, the same element can be defined without parameteres: